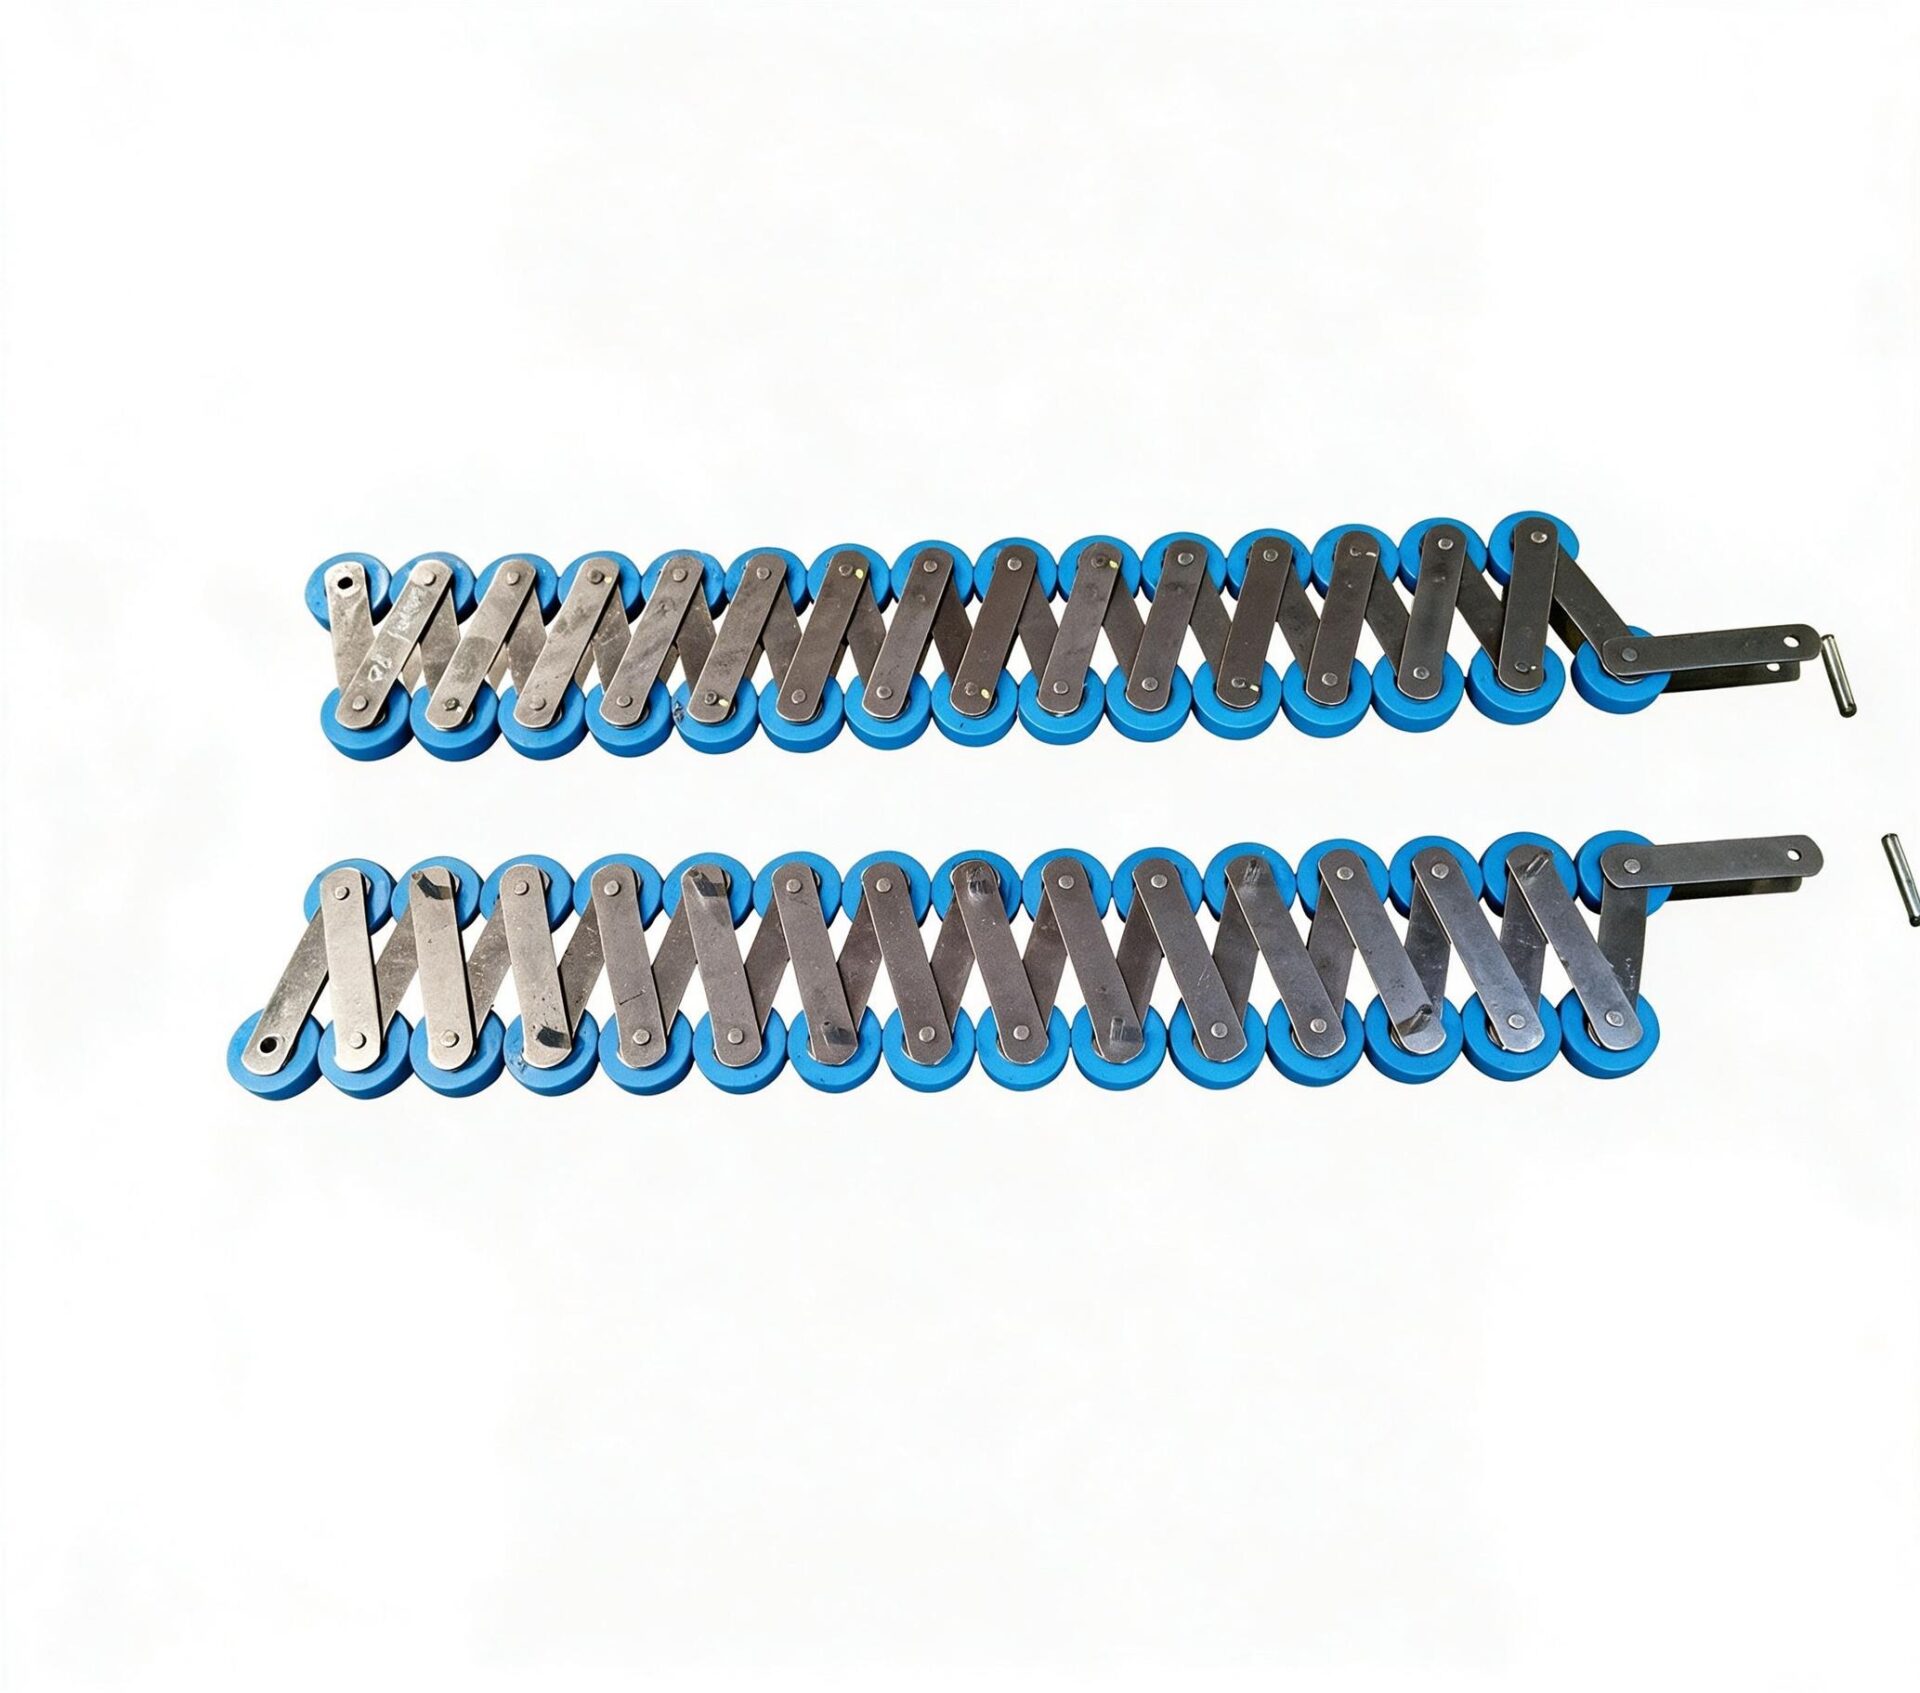
Step Chain complete 4000mm for 10 steps KONE ECO3000 and TravelMaster

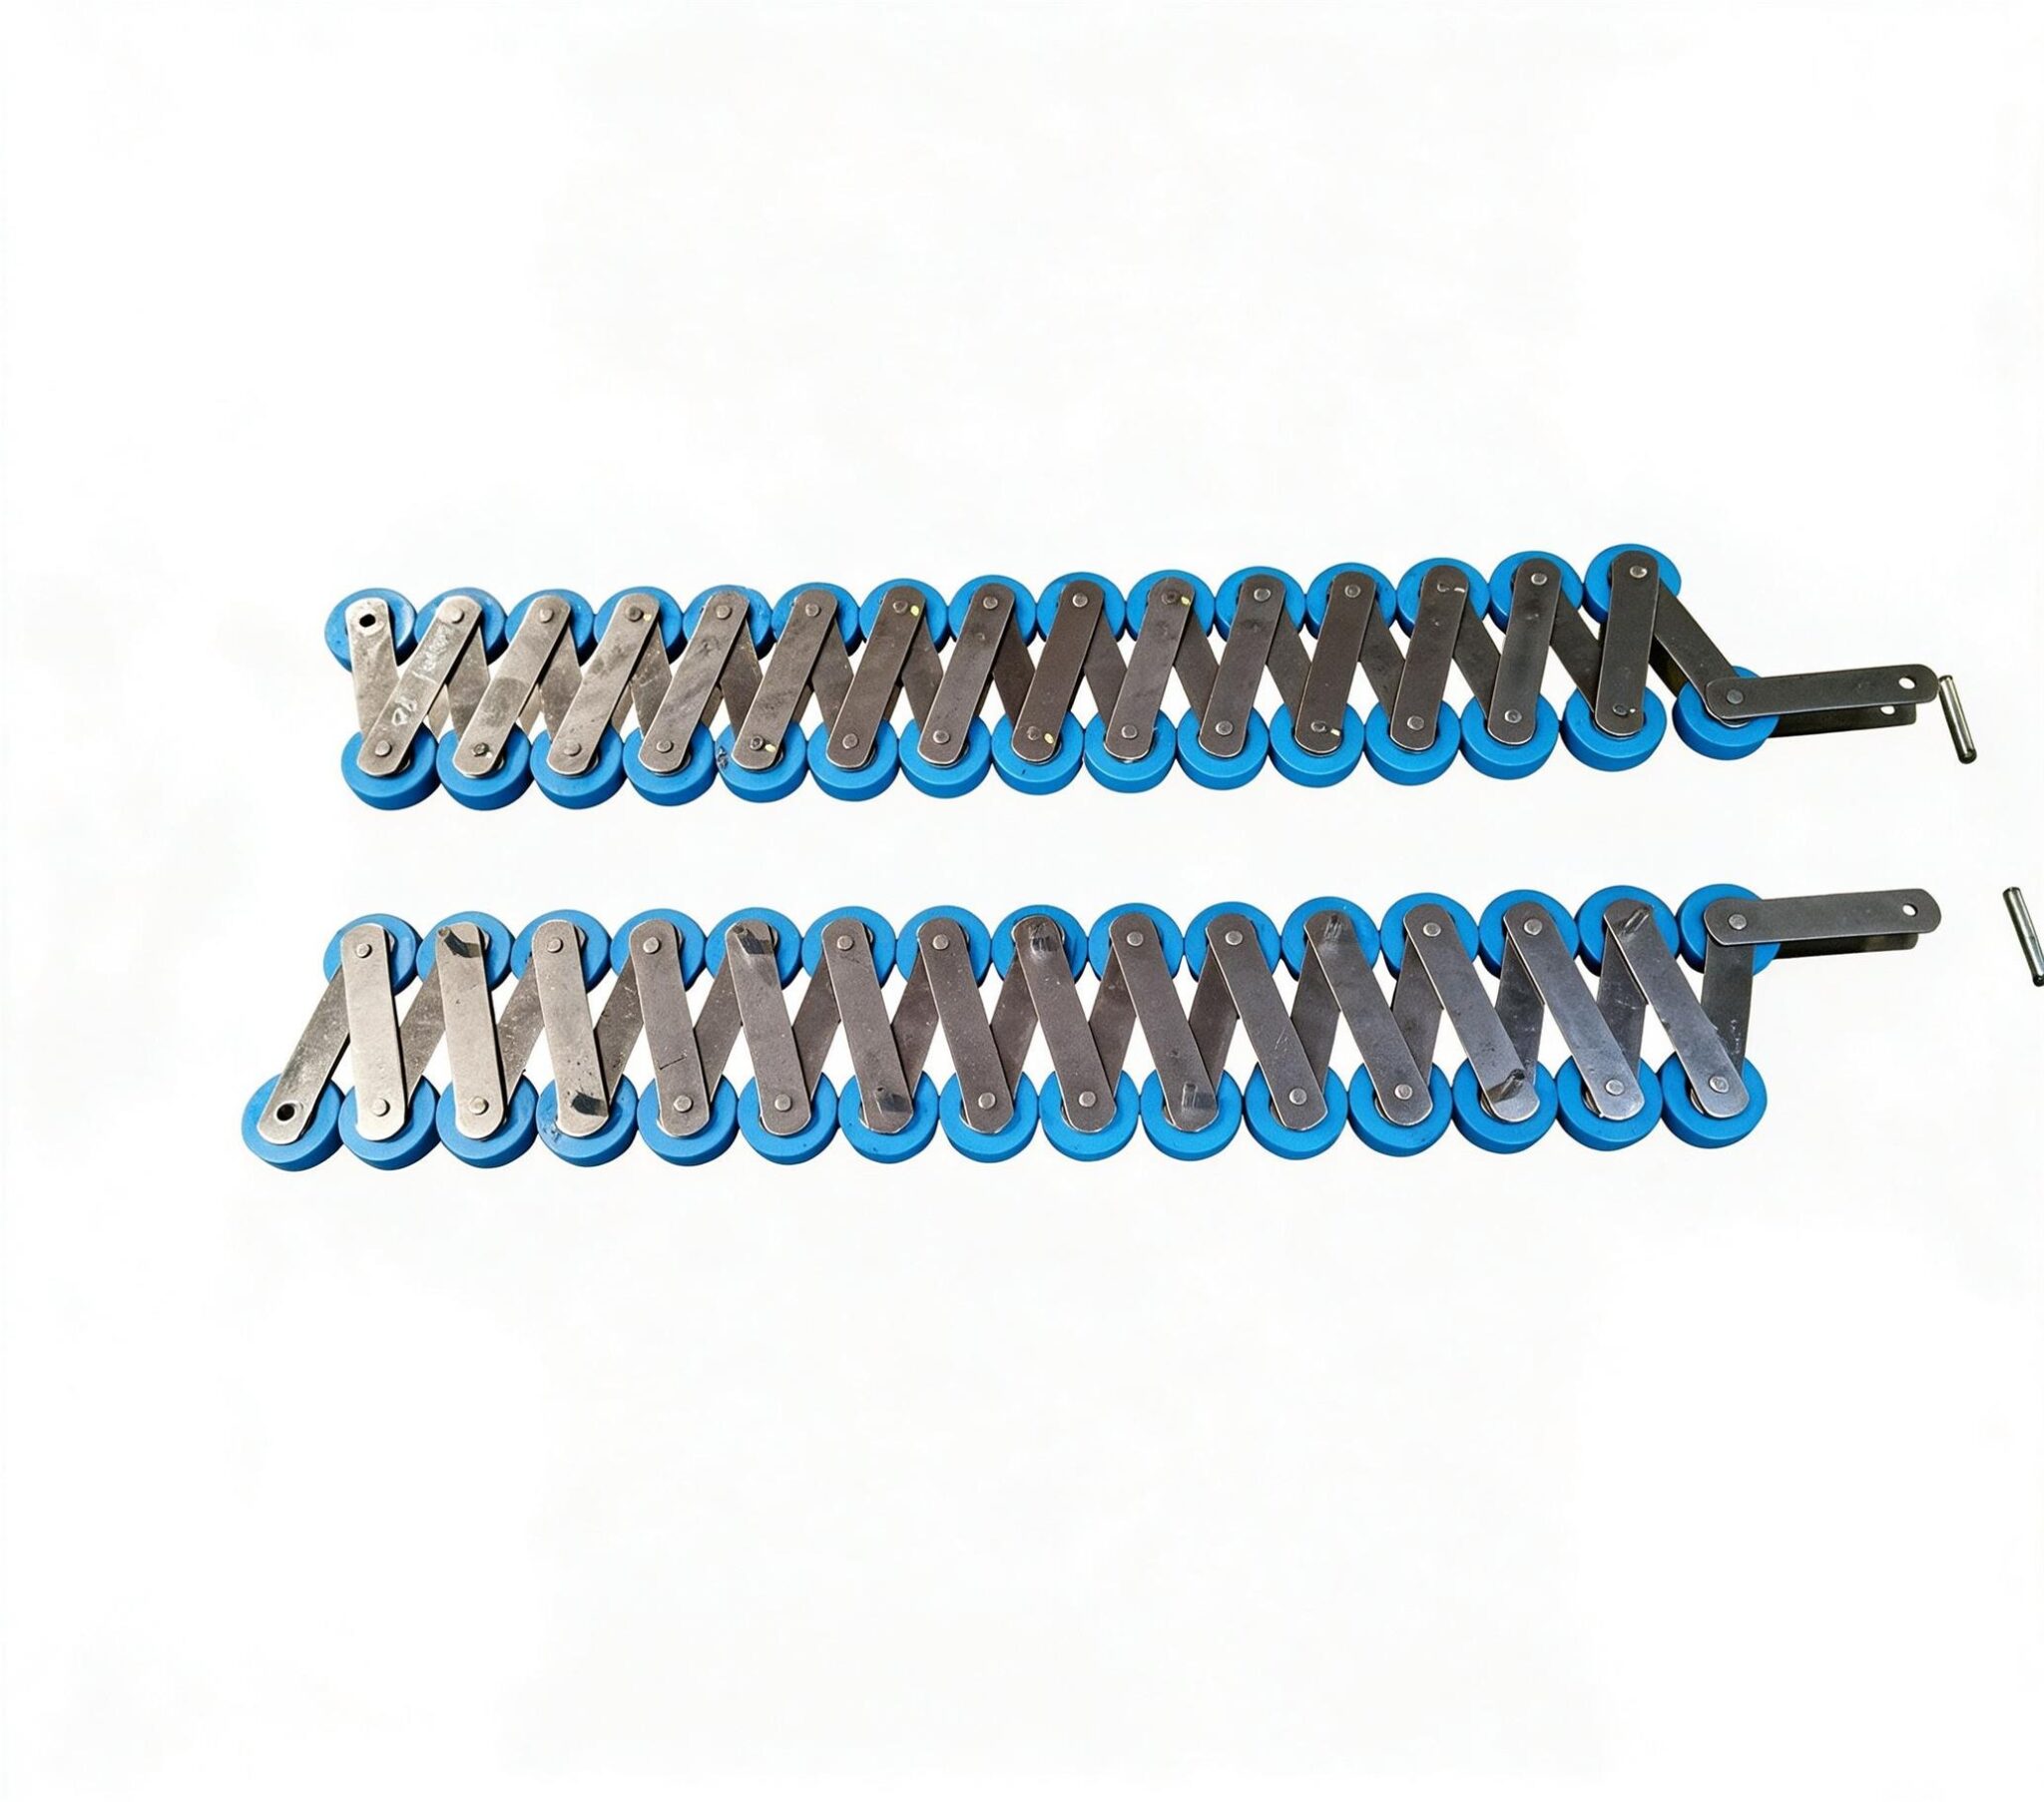
Step Chain complete 4000mm for 10 steps KONE ECO3000 and TravelMaster
OEM: KM5009350H01 13KV-C 13RI-A-TS KOSTPC02-10
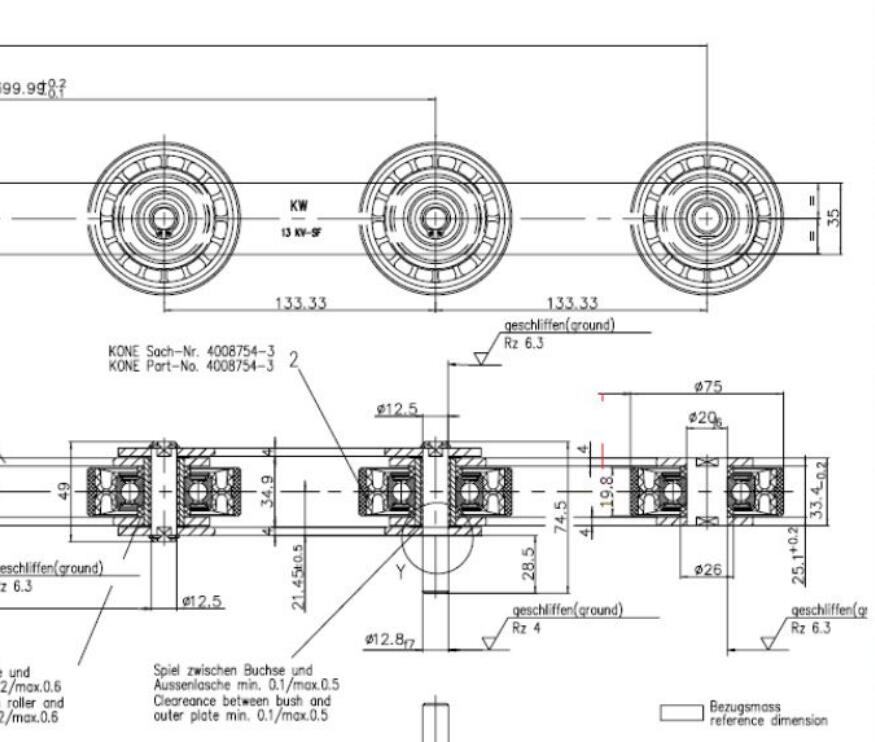
Roller: 75×23.5mm
Bearing:
Outside chain plate: 35*4
Inside chain plate: 35*4
Pitch: 133.33
Pin: 12.5*77 with cutout
Order

    Quick Help: Contact one of our experts and we'll get back to you in 24 hours!

    YouTube
    Instagram
    WhatsApp

    Step Chain 4000mm 13KV-C for 10 steps(13RI-A-TS) for KONE ECO3000(seStep Chain 4000mm 13KV-C for 10 steps (13RI-A-TS) for KONE ECO3000 (set for 2 sides 30 links right+30 links left) roller 75mm, Pin L=78mm with cutout, pin connection, FREE lubrication
    Installation

    Escalator Step Chain Installation Instructions


    1. Core Safety Precaution
      • Lock and tag out the escalator power supply before all operations, ensure the equipment remains stationary and powered off throughout the entire installation process.
      • Wear certified personal protective equipment (PPE) including safety gloves, goggles, and anti-slip safety shoes.
      • Set up safety barriers around the work area to block unauthorized access.
    1. Tools & Materials Preparation
      • Required tools: Wrenches, socket sets, chain cutters, lifting equipment, tension gauges, lubrication tools, and precision measuring tools.
      • Required materials: New escalator step chain (matching the manufacturer’s model specifications), manufacturer-approved chain lubricant, and replacement fasteners (if needed).
    1. Step-by-Step Installation
    • Step 1: Pre-Installation Inspection
      • Inspect the new step chain for manufacturing defects, deformation, or damage; confirm the chain specifications fully match the escalator model.
      • Inspect drive sprockets, tensioners, and guide rails for wear, damage, or misalignment; replace severely worn components before installation.
    • Step 2: Dismantle Obstacles
      • Remove escalator steps, inner/outer cover plates, and apron boards at the working section to fully access the chain assembly.
      • Secure the unused chain section with professional fixtures or steel wires to avoid accidental displacement.
    • Step 3: Remove Old Chain (for replacement scenarios)
      • Loosen the chain tensioner to release all tension from the old step chain.
      • Disconnect the old chain from drive sprockets and tension wheels, then lift it out from the escalator truss.
      • Clean the drive system, sprocket teeth, and guide rails thoroughly to remove dust, debris, and residual old lubricant.
    • Step 4: Install the New Step Chain
      • Lay the new chain along the guide rails, ensure precise engagement with drive sprockets and tension wheels on both sides of the escalator.
      • Align chain links with sprocket teeth accurately, avoid misalignment or tooth skipping.
      • Connect the chain two ends with the manufacturer-specified connecting links, and secure with snap rings or locking fasteners.
    • Step 5: Tension & Alignment Adjustment
      • Adjust the chain tensioner to reach the manufacturer-recommended tension value, and verify with a tension gauge.
      • Check the chain operation on both sides, ensure smooth running on sprockets and guide rails without lateral deviation.
      • Confirm the chain transitions properly at the upper and lower reversing sections.
    • Step 6: Lubrication
      • Apply manufacturer-approved chain lubricant evenly to all chain links, rollers, and pins.
      • Wipe off excess lubricant to prevent dust and debris accumulation.
    • Step 7: Reassemble Dismantled Components
      • Reinstall escalator steps, cover plates, apron boards, and other removed parts in reverse dismantling order.
      • Adjust step positions to ensure smooth movement and consistent gaps between adjacent steps.
    1. Post-Installation Testing
      • First perform a no-load test run, check for abnormal noise, vibration, or chain skipping issues.
      • Conduct a full-load test run per the escalator’s rated load, verify the chain runs smoothly and steps operate synchronously.
      • Recheck chain tension and alignment after test runs, make minor adjustments if necessary.
      • Confirm all safety protection functions work normally before putting the escalator back into formal service.

    Common question

    Delivery time About 7-14 days in peak season.
    Warranty period 12 months.
    Product packaging Carton or wooden box/pallet, depending on the different situations.


    You Also Like